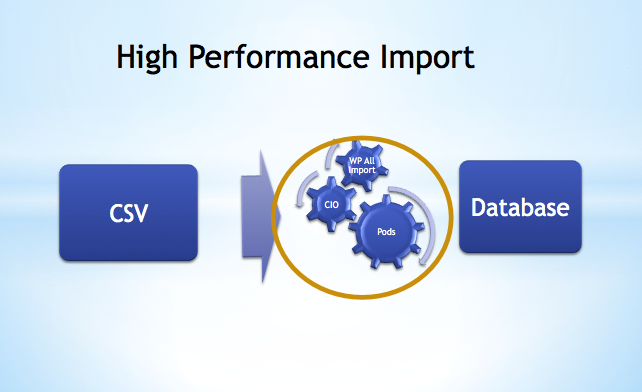
WP All Import is a well developed tool to import XML and spreadsheet data (CSV, Excel etc) to WordPress sites. It divides big files into smaller manageable chunks during the import process, and offers many options to customize the import configuration according to server resources available. It is possible to import tens of thousands of records to your website, and update these records regularly using WP All Import.
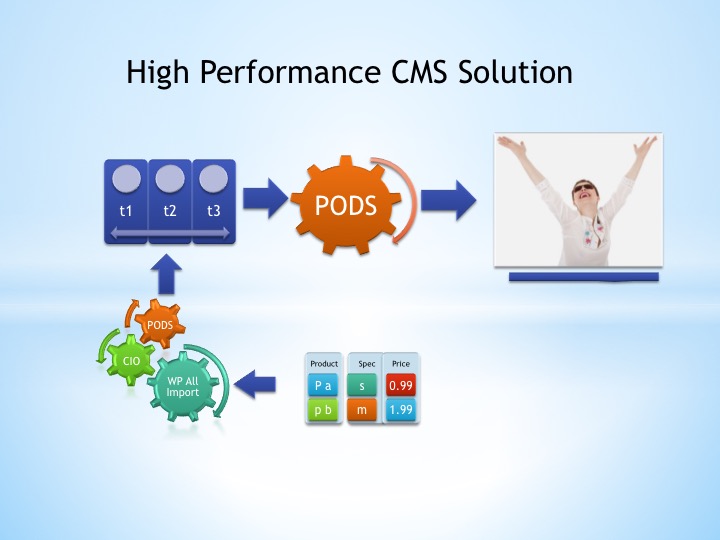
As an add-on plugin working together with WP All Import and Pods, CIO Custom Fields Importer enables importing from any CSV or XML file to any contents on a WordPress website, including embedded tables such as TablePress tables. These three plugins form a high performance import suite meeting all your data import needs.
 The following tutorial shows how to import a list of customers to WordPress for use by WooCommerce, a popular eCommerce plugin for running an online shop. We will use our high performance import suite for this task. For the sake of this tutorial, we assume
- You are migrating to WordPress.
- You have already installed WordPress and the WooCommerce plugin.
- You know how to install and activate new plugins.
- Your customer list is in CSV or XML format.
You can search for a tutorial on installing WordPress and plugins if you are new to WordPress.
Preparation for Importing Custom Fields
Prep 1. Install and activate the import plugins.
Install the three plugins required for import (WP All Import, CIO Custom Fields Importer, PODS). Both WP All Import and PODS are available for free download from WordPress plugin repository. CIO Custom Fields Importer Pro is available for immediate download after paying a small fee.
Prep 2. Extend user using pods.
WooCommerce customers are essentially WordPress users on your website with the role of “customer”. In order for Pods to handle data storage to user fields, we need to extend the WordPress built in content type “user” using Pods. This allows Pods to communicate with WordPress codes in creating and updating user records.
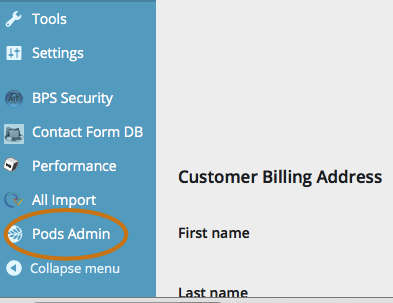
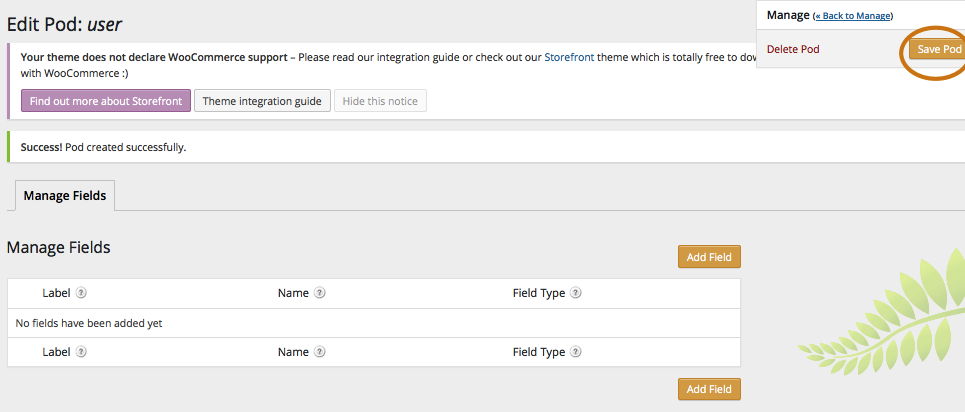
At the left of your WordPress admin back end, look for Pods Admin menu link and click on it.
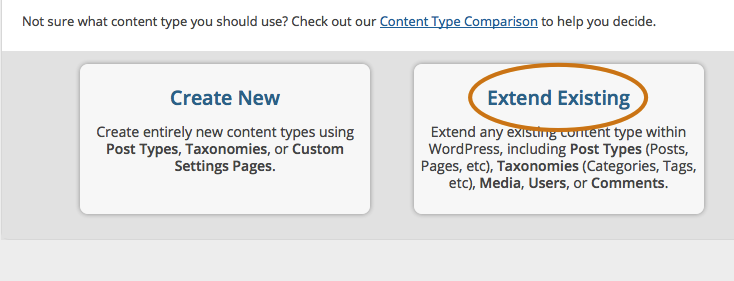
 You will see two options, “Create New” or “Extend Existing”. Choose “Extend Existing”.
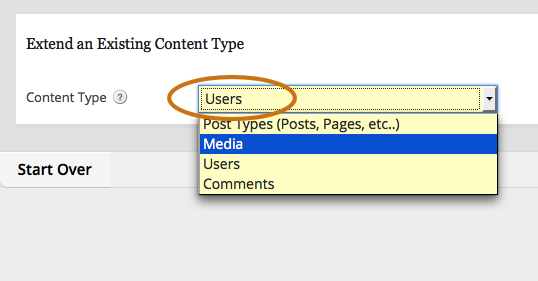
 A list of WordPress builtin content types will be presented as options. Choose “User” to extend.
In the next screen, you will see the “edit pod” admin page. Just in case you are wondering, each content type (new or extended) is called a “pod” in Pods. Click on “Save Pod” button to confirm the extension of user content type.
In this screen you may create additional fields to store extra information about customers. There are extensive documentation on Pods website explaining field types and how to use then. For the simplicity of this tutorial, let’s assume you will use the fields provided by WordPress and WooCommerce. After importing your customer list, You can always come back to this screen later, create new fields, and run the import again to update the newly created fields.
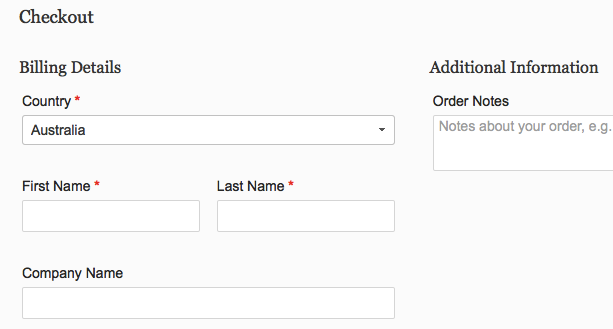
Prep 3. create one complete customer record manually
This is an important step. CIO Custom Fields Importer detects custom fields using the record you have created manually. So please fill in as much information as possible in this record.
You may register a dummy customer record at the front end of your website using WooCommerce’s checkout page.
 Now we are ready to start import WooCommerce customers.
Import Users (WooCommerce Customers) to WordPress
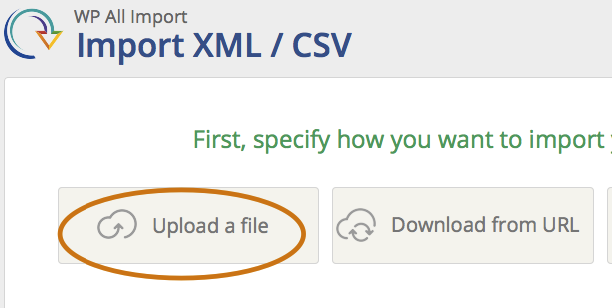
Step 1. Upload your file of customer list
In your WordPress admin back end, look for WP All Import menu link, click on it. Then choose “Upload File”. If you have a very long customer list, you may create a small file with a few records just for this tutorial. Once you are familiar with the import process, you can then upload all the customers.
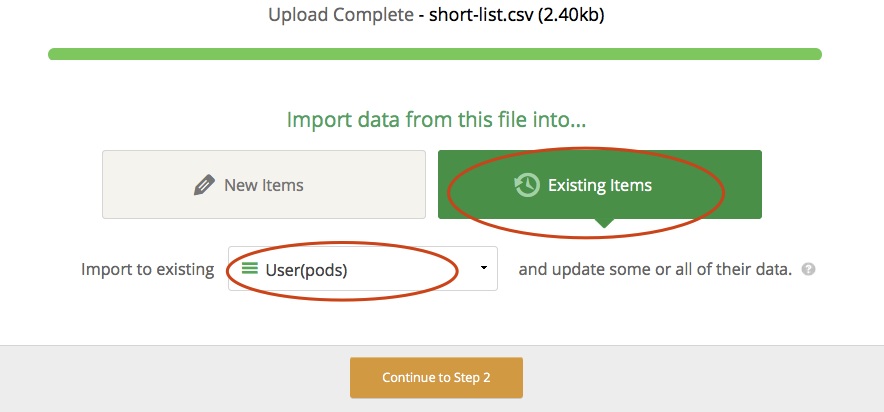
When the file is uploaded, you will be presented with options “New Items” and “Existing Items”. Please always choose Existing Items (we will explain this later). Make sure you scroll down the list and choose “User (pods)” to import.
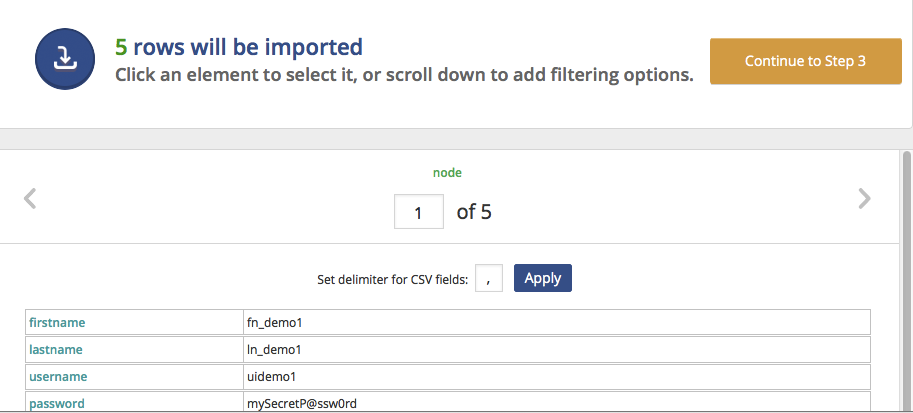
Step 2. Automatic Recognizing of Records
In the next screen, you will see the list of records recognized by WP All Import. If only the first row is recognized, most likely the CSV file is not properly formatted, such as the CSV files created by Microsoft Excel. This problem can often be solved by opening the CSV file and saving it again using another spreadsheet program such as OpenOffice or LibreOffice.
 Step 3 Mapping Custom Fields to Import by Dragging and Dropping
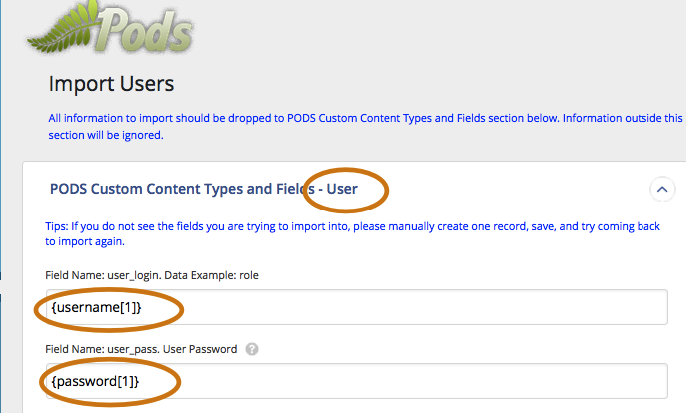
In the next screen CIO Custom Fields Importer detects all the custom fields and use the data you have entered manually as example. You may drag fields to import from the right hand panel, into the fields you want to import to. Your source file can use any header name in any sequence.
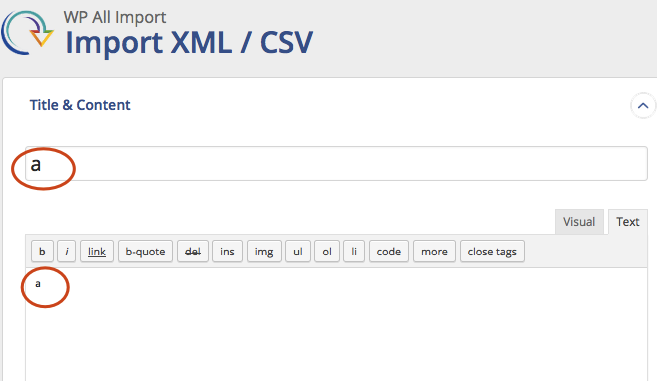
Since we are importing users not posts, you may type your favorite letter or number in the field of post title and content field. WP All Import will create ONE dummy post with this title. The post title and content are actually optional and are for us to understand the import log messages. If you leave title and content fields blank, WP All Import will create one dummy post without title or content.
Please note user email address is mandatory and unique field in WordPress. You must assign a unique email address here. Otherwise the import may not proceed. You can’t create a WordPress user without email address. The user name field may also be mandatory field.
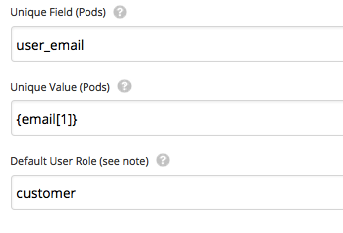
 At the bottom of the custom fields list, there are three fields, Unique Field, Unique Value, and Default User Role. Unique Field is the name you are going to check for duplicate records. In this tutorial, we will check whether the customer records are already in the WordPress user table. This will decide whether to update existing record, or to create a new one. So the Unique Field will be “user_email” (which is the field name in WordPress user table). You may drag and drop the customer email from the source file to the field Unique Value. CIO Custom Fields Importer will check customer email against the user table and decide whether to update existing customer records or to create new ones.
The Default User Role field is used to assign role to imported customer records.
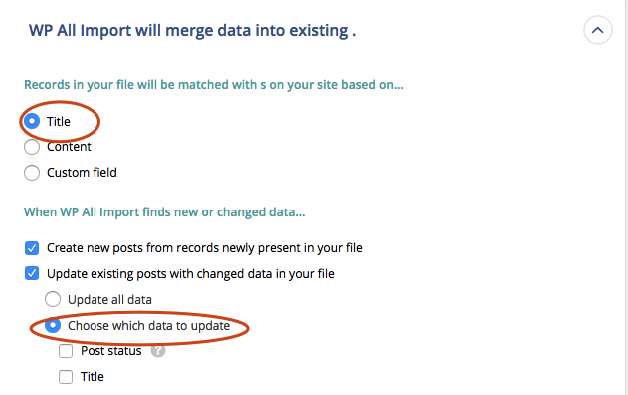
 In the next screen you will be asked how the records will be matched against existing posts. Please choose Title as shown in the screen shot. WP All Import will search for a post with this title and if none exists, it will create one dummy post with this title. If one exists, it will pass on the custom fields to CIO Custom Fields Importer.
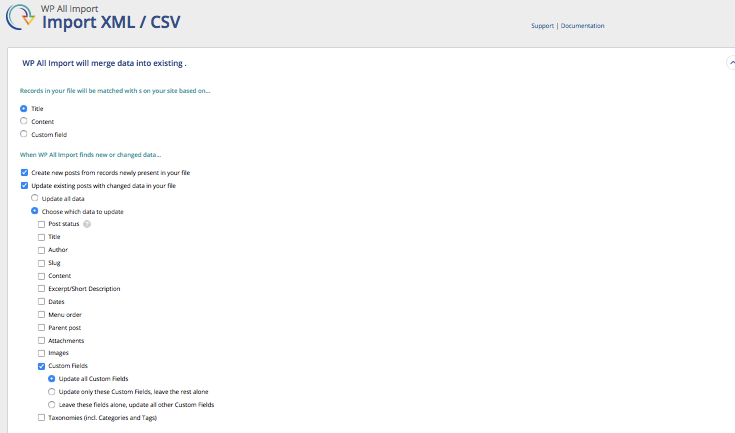
 You may uncheck all the boxes except Custom Fields, and configure WP All Import to update all custom fields. This will speed up the import process.
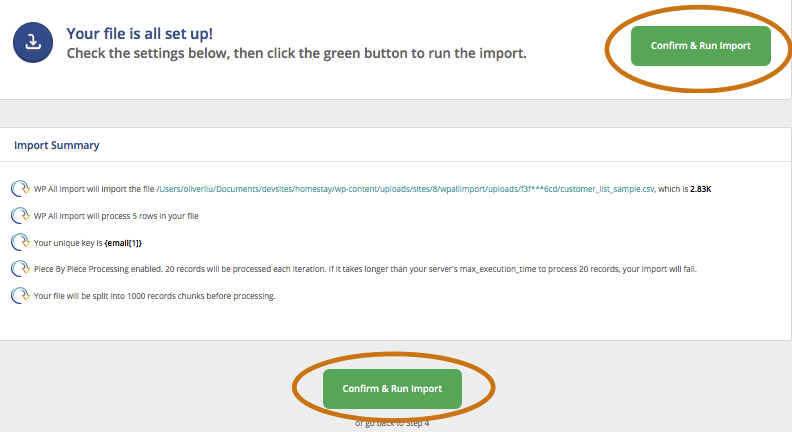
The next screen will give you a summary of the import settings. Once you are happy about the settings, click on the big green button to start importing.
Step 4. Import
The import will start. It may take a while depending on server resources and the number of records to import.
If there are any issues, import will not proceed, prompting you to click and try importing less records in each iteration.
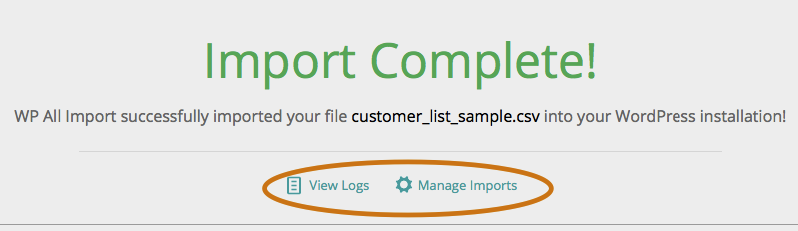
When the import is complete, you will see links to import log and import history. If you have missed anything in the initial import, you can simply run the import again to update some fields.
The process of importing other content types is similar. You upload the file, choose the type of contents to import, and import plugins will handle the rest.
What Is Next?
Pods is a powerful framework that can do much more than saving data to a database. Your website can potentially speed up by a few times by changing custom fields storage and running optimised queries. The actual performance enhancement depends on how you use your custom fields and how you store custom fields. If your website is struggling with increasing number of custom fields, please contact us for an obligation free consultation of optimising your website.
Very thorough and clear, thanks this will save me loads of time
Colin